Thursday, August 19, 2010

Baby gifts finale (for now)

So here is a wrap up the belated gifts that I made for a recent baby shower...a total of three more gifts.

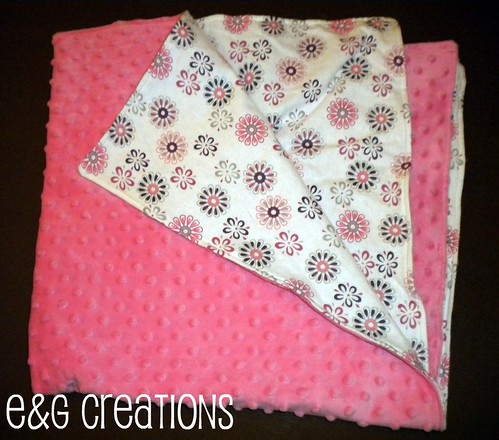
I had purchased some minky fabric when my daughter was a baby as well as a couple of flannel prints. I had used the minky to make her a car seat cover for the winter...but had lots left over. The fabric is so soft and feels sooo nice to touch...however, it is not my favorite for sewing. I have made a couple of blankets with minky now and I never feel like they end up looking quite as "finished" as I would like.

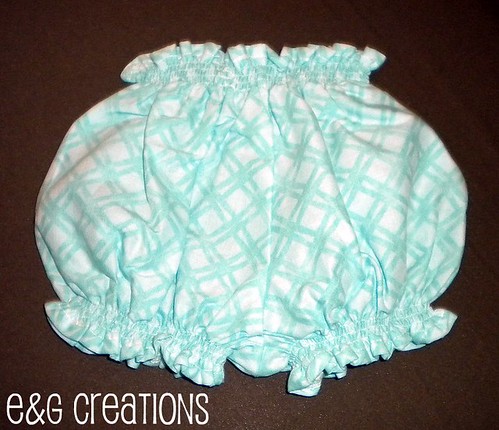
For this blanket, I measured the blanket to be the size of the remaining minky fabric and then cut the flannel print to size as well. I made a basic box, with right sides together. I then serged three of the edges and part of the four edge. I then turned it right side out and top stitched around the edges, closing the last half of the fourth edge. Overall, a very basic concept...just lots of stretching and slipping the minky fabric. In the end, I still handed it over as a gift...so not so bad that I thought it had to be converted into another project.


Minky Blanket


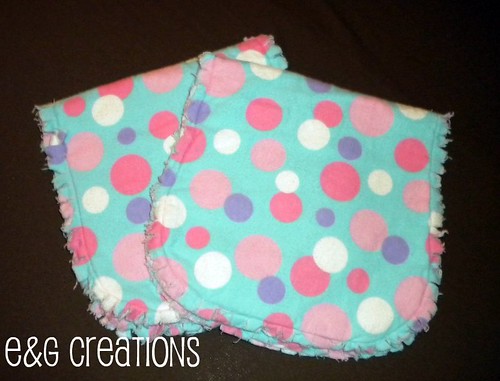
In between some of my frustrations with a couple of these shower gifts, I needed a simple project to restore my confidence. I used this
tutorial to make a couple of burp cloths.


Burp Cloth


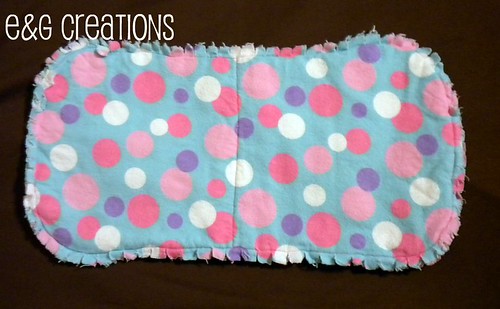
I purchased a fabric remenant for $.70 and used some Warm & Natural that I had purchased on sale. Super inexpensive (i.e. cheap) and super easy to make gifts! I was not sure that I really like the unfinished/frayed edges...but I only washed the cloths once (due to time sake). I wonder if I had washed more if it might have looked better. I still would make these again....you can't go wrong with cheap & easy!


Burp Cloths


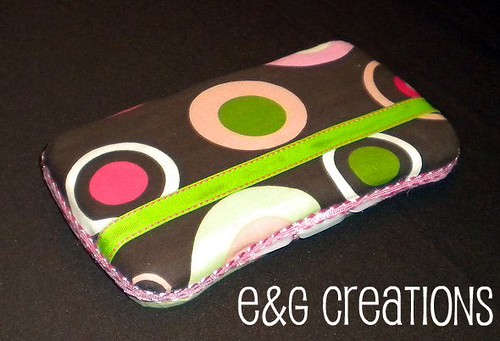
The last gift for this mom was a diaper wipes case. I started with the intention of using this tutorial that included a diaper pouch. It was a great concept and super cute...but I decided I needed to start with the basics first. I ended up using this tutorial instead. I am not normally a glue gun girl...so the glue gun & I had to come to an understanding...but after...things went smoothly. My only disappointment with the finished product is that the glue used under the ribbon embellishment is visible.


Diaper Wipes Case


I haven't decided if it bad or good, but I still have two other people to make baby gifts for as well. One is a friend who lives overseas and just had her baby girl (all 11lbs...can you imagine!!). Those presents are my first priority. There is also someone at church that is due at the end of October and I want to make a few things for her baby girl as well. Hopefully, I might be able to fit in another, un-baby, project in before her gifts!


sign

Monday, August 16, 2010

T-shirt dresses

Earlier this summer, I was in a t-shirt dress craze. I bought the Sienna Dress pattern from Lil Blue Boo. There are seriously almost endless possibilities of how this dress can be customized. I was particularly smitten due to how inexpensively I could make these dresses. My daughter can be pretty tough on clothes and so I hate to spend much for "play" clothes. The dresses are also very quick and easy to complete - something else I find very appealing in a pattern.

The first dress that I made was from 3 t-shirts that I purchased at a garage sale. I had less than $1 invested in all three t-shirts. I still had material left, so the way that I figure, this dress was about $.50 (or less) to make!!!! I can't tell you how INCREDIBLY exciting that is to me!!! Yes, I am cheap...and proud of it!!


Sienna Dress - from Lil Blue Boo


I was nervous about leaving the serged edges on the outside of the dress...but I ended up loving it. I thought it made the dress look funky and relaxed.

Sienna Dress - from Lil Blue Boo


My first attempt at the Sienna dress ended up being my favorite (below). I found the Old Navy tee (I Heart Mom) at Goodwill for $2. I didn't know what I was going to do with it when I bought it, but I couldn't pass it up. It worked perfectly for this dress. I paired it with another Goodwill t-shirt and some white scraps courtesy of my mom. While the picture below is a bit cheesy....I love this dress (maybe due to the saying on the front...it is pretty good)!

As a side note, this dress does not have instructions for cuffs on the sleeves. I wanted the sleeves to be capped, so I added this feature to both dresses. I added two pleats to each of the sleeves (sounds strange but I think it looks fine) to account for the extra fabric in the sleeves to fit into the "caps" that I made for the sleeves.


I LOVE Mom - Sienna Dress from Lil Blue Boo


I made two more dresses from this pattern...but I have taken any pictures of them yet! I think that both look quite a bit different than both of these as well. Seriously...so many possibilities...all with t-shirts that could otherwise be thrown away!!!

sign

Saturday, August 14, 2010

More baby presents...

Here is a continuation of the baby mania! I made another "outfit" for the belated baby shower gift, to accompany the shirred baby outfit and booties.

I decided that I just had to try my hand at a ruffled onesie after reading this
post on Homemade by Jill. I used the tutorial she had posted about and I opted to use her idea of knit fabric so that no hemming/serging was needed for the ruffles. The picture makes the ruffles look a bit crooked but I think it was the angle of the picture (that is my story...and I am sticking to it...as it could not have been my sewing technique :) !). This was really easy...I love a fast and easy project; it feels so satisfying.


Back of Ruffled Onesie


I wanted to also add something to the front of the onesie. I decided to try a reverse applique. I have seen this idea blogged in several different places...but I just winged it. I cut out the letter "K" and then turned the onesie inside out. I positioned the letter (backwards) on the inside of the onesie and then I added a layer of lightweight interfacing on top (slightly bigger than the letter). I then ironed the interfacing to the letter/onesie, which was for a two-fold purpose: 1) to add a stabilizer to the knits, especially the onesie and 2) to help keep the letter in place while sewing. I then chose a knit stitch on my machine and stitched around the letter. I actually went around the letter a couple of times. I then turned the onesie right side out and cut (this somehow felt wrong for some reason) out the part of the onesie covering the letter. Below is the result:

Front of Ruffled Onesie


I have also been wanting to make a pair of baby legs since my daughter was smaller...but just never got around to it. I had purchased the socks and it coordinated with the pink knit fabric, so I decided to also whip up a pair of the baby legs. Again, this inspiration came from Homemade by Jill and I used the tutorial she recommended. The picture quality is less than ideal...but again, these were super easy. I would make a ton of these, but I haven't seen a lot of cute, cheap socks.

Baby Legs


Here is the finished "outfit"....the pinks don't exactly match...but I think it will still be wearable!


Onesie & Baby Legs


Linking to these parties!


sign

Tuesday, August 10, 2010

Baby Mania!

I have been baby crafting up a storm...and there is not an end in sight yet! I had baby shower that I was supposed to attend last month and I could not make it. I had decided to make all of the gifts. Well, I finally finished all of the gifts and handed off the presents today! There were quite a few though...so maybe that is at least something of a reason (excuse) for my delay. I am going to spread the presents out over a couple of posts.

I can't decide which to show first...so I think I will go with my favorite (though it is tempting to save it for the last post). This project started with a pair of booties (acutally they were requested by a relative of the mother). I used the basic premise of a Simplicity pattern, but I adapted the pattern to make it a Mary Jane style, with a lining and with elastic for the strap. I love baby booties...they are just too darn cute.


Baby booties

(Sorry for the photo quality...my camera and I are not on speaking terms right now!)


Well, I decided that I couldn't just make baby booties...they needed to coordinate with an outfit. I LOVE elastic thread now (thanks to Dana of MADE) and so of course, I thought it would be great to use the Summer Vacation Dress concept for a matching top. However, I am embarassed to admit, I made this top a total of 3 (yes, really) times. The concept is super easy and once I figured out the sizing...it was easy peazy...however getting there was quite a process. Dana's pattern does not include sizing for newborns..but there are basic instructions for adapting. Well, my adapting skills need some work. I don't have a newborn...and only have a couple of newborn onsie's on hand. My unsuccessful attempts ended up being too small; however these have made great doll clothes for my daughter. I am still not completely confident that the sizing is correct, but I definitely think it is close.

MADE top for newborn

I used the star fabric from the booties for the bias tape for the shoulders/arms and the polka dot fabric also from the booties.


Of course, the outfit would not be complete without a pair of bloomers. I used an old pattern that I had for my daughter for sizing of the bloomers. However, I decided to continue with the elastic thread (it is addictive!) for the waistband and legs instead of the traditional casing in these areas.


Bloomers

I used the fabric from the bottom of the booties for the bottom of the outfit!


So here is the outfit together! I love anything newborn...it is so little...just for that alone it is adorable! I was pretty happy with the finished project though!


Baby gift

Several other projects will be forthcoming...and plans for even more in the very near future as well!


Linking to:

make it wear it Join  us Saturdays at tatertotsandjello.com for the weekend wrap up        party!


sign